
Respondus: Offline Test Authoring Tool
Northern Arizona University has a campus-wide license for Respondus. You can download Respondus from ITS.
Search by either Windows in the Platform field or by Development in the Category field. Respondus is not available for Macs.
Look for the Respondus 4.0.4 link:
Select the link to go to a page that discusses Respondus' features. This page also has very important information in red. This includes the installation password. It is a good idea to keep this page open after you download Respondus. When opening Respondus, you can copy and paste the information into the appropriate fields.
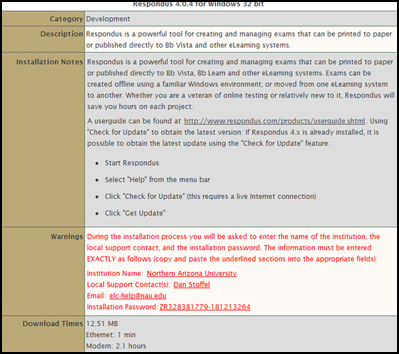
Select the Download button at the bottom of the page to save or run the Respondus4Campus.exe program file.
Download the Respondus manual by selecting the link to the user guide.
Select the manual labeled with the Respondus 4.0 User Guide -- Blackboard Personality. This will download a Microsoft Word document.
Personality Setting
When you first start using Respondus, you will need to set the Current Personality to Blackboard 7.x - 9.x.
![]()
Building Quizzes
Review the user guide to learn how to build questions and quizzes in Respondus.
Importing Quiz Questions into Respondus
Respondus allows you to import multiple choice, true-false, essay, fill in the blank, fill in multiple blanks, matching, ordering, jumbled sentence, and multiple answer questions from a file. The questions must be organized in a format that is acceptable to Respondus and the file must be stored in one of the following formats: plain text (.txt), rich-text (.rtf), MS Word (.doc and .docx), tab/comma delimited (.csv) format, StudyMate Class format (.zip and .xml).
The formatting required for all file formats except for .csv files is described in the Respondus Help section entitled "The Standard Format for Importing Documents." The formatting required for .csv files is described in the section "Importing Tab/Comma Delimited Files (CSV)." Once the file is in the Standard Format, follow these steps to import it into Respondus.
From the Start menu, select the Import Question button.
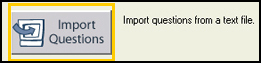
The following dialogue box will appear:
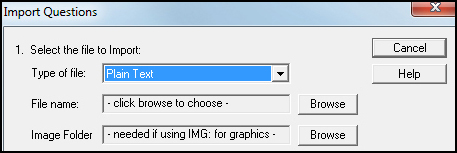
Next, select the type of file that will be imported, and then use the Browse button to locate and select the file to be imported.
![]()
Create a new Respondus document name in the textbox.

Each question imported will have a "title." If no title is specified, the Respondus will automatically use the first 20 characters of the question wording as the question title. If you select the "Use stem..." checkbox and enter the text "01-" (for Chapter 1), the title for the first question being imported will be 01-001, the title for the second question will be 01-002, and so on. (You are not required to enter a stem phrase--this feature is entirely optional.)
![]()
Choose the Preview button to examine the imported file and to see if there are any warning messages.
![]()
If a warning occurs, then reexamine the file to make sure that it is formatted properly. Once the Preview dialog box says No Warnings, then select the Finish button.
After importing all the questions or building out a quiz in Respondus, then you are ready to publish it to a Blackboard Learn course.
Publishing Quiz to Your Bb Learn Course
When you are ready to upload your Respondus quiz to your Bb Learn course, you will need to set up the connection settings.
Select the Preview & Publish tab.
Choose the Publish to Blackboard option, and start the Publish Wizard.

Blackboard Server Connection settings
When opening the wizard, you will want to do the following:
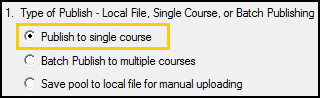
Select Publish to single course.
Next, in the Blackboard Server drop down menu, choose add new server.

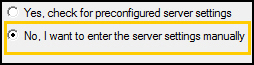
The Add New Server Settings dialogue box will appear. Change the option here to No, I want to enter the server settings manually, and then choose Next.
Follow the directions on the Blackboard Server and Course dialogue box to connect to the Blackboard Learn server.
Open your browser, go to the Blackboard Login page where you type your name & password, and copy the URL address from the browser to the textbox next to the first question.

Then, go to the course where you have instructor rights (any course will work for this option), and then copy the URL address into the second textbox.

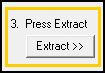
Select the Extract button to automatically fill in the server information.
Type in a name in the Description textbox like NAU Blackboard.

Enter your NAU username and password.

Only check the Remember my Username and Password option, if this is your personal computer.

Then, select the OK button, which is located in the upper right hand corner of the screen.
![]()
Once you have set this up, you will not need to do this again except to change the settings if your password changes.
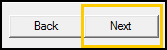
You will return to the Publish Wizard. Select Next to continue.
Select the course where you want to publish the quiz from the drop down menu.

Next, type in a name for your quiz.

Select the Next button.
Choose the Blackboard Learn course folder where you want to put your quiz, and then select Next.

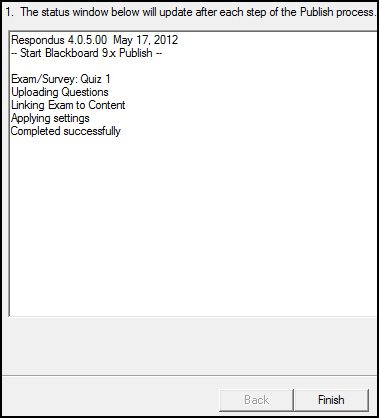
A status window will show you when you have uploaded your questions successfully, then choose Finish.
Your quiz is now in your course!