CPS for Power Point (plug-in)
Similar to the traditional Classroom Performance System (CPS) program, CPS for Power Point allows you to set up and synchronize classes with online roster from eInstruction.com, deliver teacher and student-led assessments, and generate reports. The difference between the traditional CPS and CPS for Power Point is that now you can create special CPS slides within your Power Point presentations. Using the CPS slides, you can engage students in a lesson while using your existing Power Point presentations.
For Windows Users Only
Download CPS for Power Point
Hardware set up
Create/Open your database
Import an online class roster
Inserting a clicker question slide in your Power Point
Engaging students in a clicker question
Engaging verbal clicker questions on the fly
Taking attendance using CPS for Power Point
Generating Reports
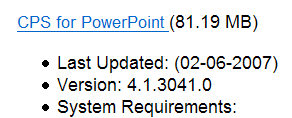
Download CPS for Power Point
- To download CPS for Power Point, follow this link found at www.einstruction.com.
- Choose CPS for Power Point from the drop down menu.
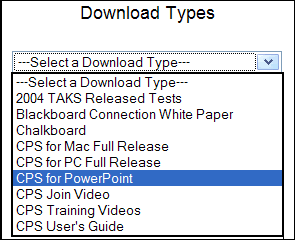
- Select OK.
- On the CPS for Power Point download screen, select the CPS for Power Point link.
- Follow the instructions on the screen to download the program to your computer.
Hardware set up
- Plug your receiver into a USB connection.
- Turn on your computer.
- Go to the Start menu.

- From the Start menu, open CPS for Power Point (sometimes this can take a long time).
- Once CPS for Power Point opens, choose Delivery Options.
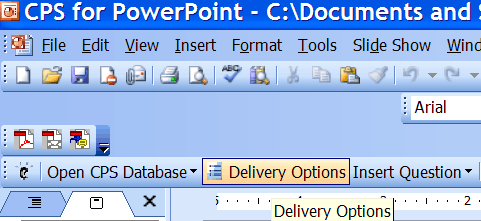
- After the CPS - Delivery Options dialog box opens, select the Receiver tab.
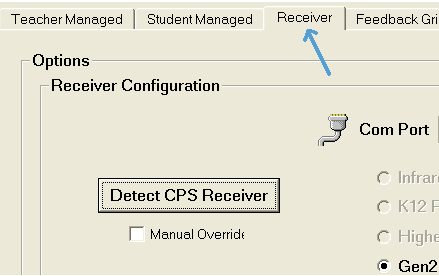
- Choose the Detect CPS Receiver button.
- Wait until the system auto-detects your receiver, select OK.
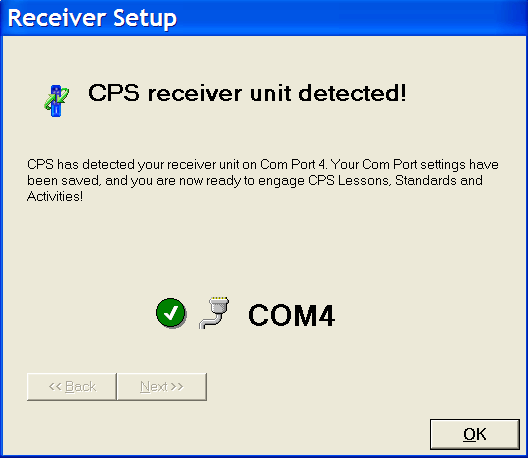
- To close the CPS Delivery Options dialog box, select OK again.
- Ask the students to turn on their clickers by pushing the Power/Join button on their clickers.
*Note: Most of the time, your computer will automatically detect your receiver and you will not have to perform the last four steps.
*Note: Sometimes a student's response pad does not want to join the network. In your class roster, check to make sure the student's registration information is correct (serial number). Then, try to import the class again. Otherwise, you just have to wait a few moments.
Create/Open your database
A CPS database stores class information including your lessons, team activities, reports, gradebook, roster, attendance, and any other information collected from the clickers.
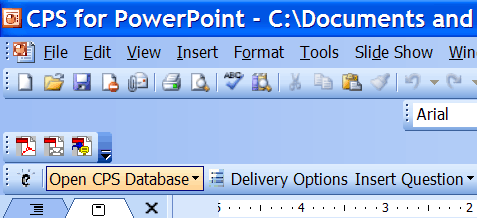
- Select Open CPS Database.
- An Open CPS File drop down menu appears.
- Choose New Database or Open Database (if you already created a database).

- The New CPS File window appears.

- Give your database a name in File Name box.
- Select Save and choose the location where you want to save your file.
- Select Open.
- Select Save.
*Note: If you are moving between computers, it is a good idea to save your database on your bonsai.ucc.nau.edu shared drive. Follow this link or call ITS at 523-1511 to learn how to set this up on your computer.
Import an online class roster
- From the Start menu, open CPS for Power Point.
- Follow the Hardware set up instructions.
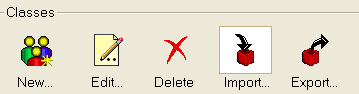
- Select the Classes tab.

- Select Import.
- When the CPS New Class Wizard appears, choose CPSOnline.
- Select Next.
- Keep Higher Education as the default for the Institution Type.
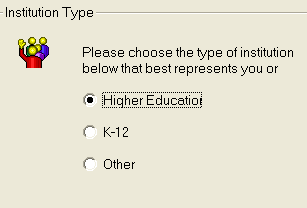
- Choose Next.
- If you have used CPSOnline before, choose Yes, and skip to step 11. If this is your first time using CPSOnline, choose No and continue to step 10.
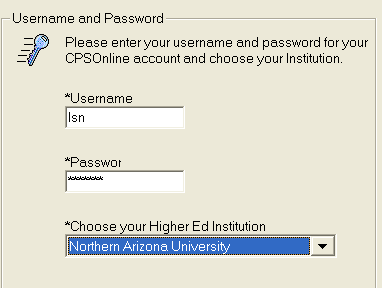
- Enter your Instructor Setup Code. If you do not have one, please contact eInstruction at 888.333.4988 then select Next.
- Enter your CPS username and password, and select your institution from the pull-down menu.
- Choose your class by selecting the check box.
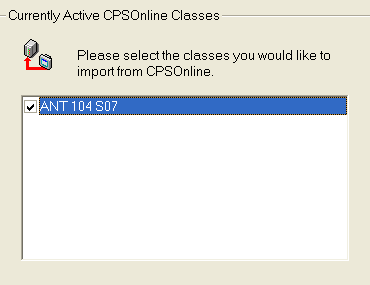
- Choose Next.
- CPS will synchronize your class with CPSOnline and create your class roster (this may take a few moments).
- Choose Done.
- When you select your class on the left, your class roster will appear on the right.
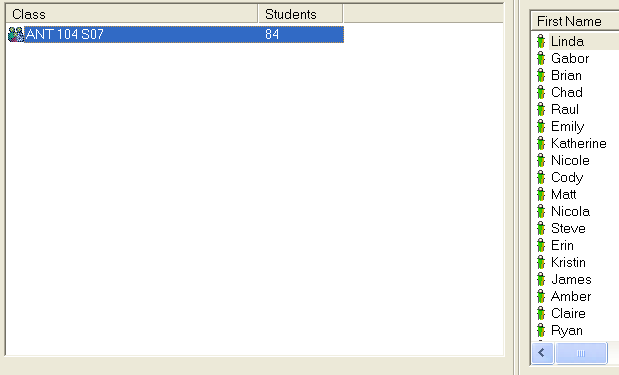
Close the Classes screen.
Inserting a clicker question slide in your Power Point
- From the Start menu, open CPS for Power Point.
- Open a Power Point presentation file you created in MS Power Point 2003. Be sure you are in CPS for Power Point and NOT MS Power Point.
*Note: CPS for Power Point only works with Microsoft Power Point 2003.

- Locate where in your presentation you would like to insert a clicker question slide.
- Place the cursor in the new location.
- From the CPS toolbar, select the Insert Question button.

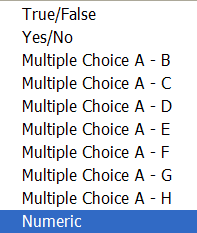
- When the pull-down menu appears, choose the type of question you would like to create.
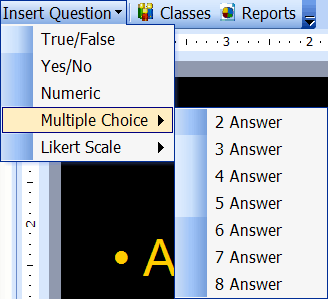
- Power Point inserts a CPS slide into your presentation.
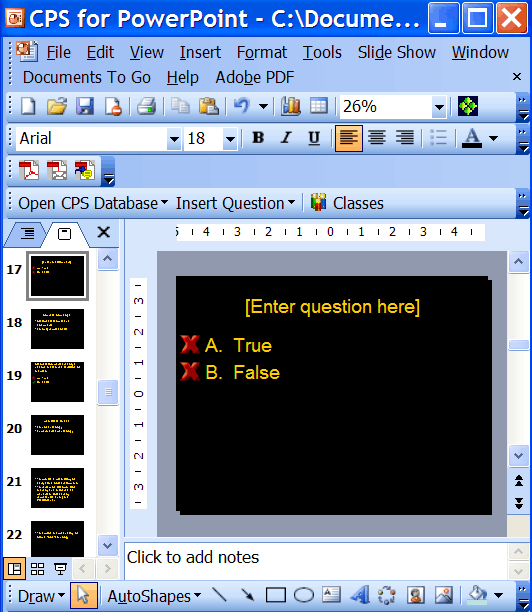
*Note: Be sure to turn off all animations for this slide.
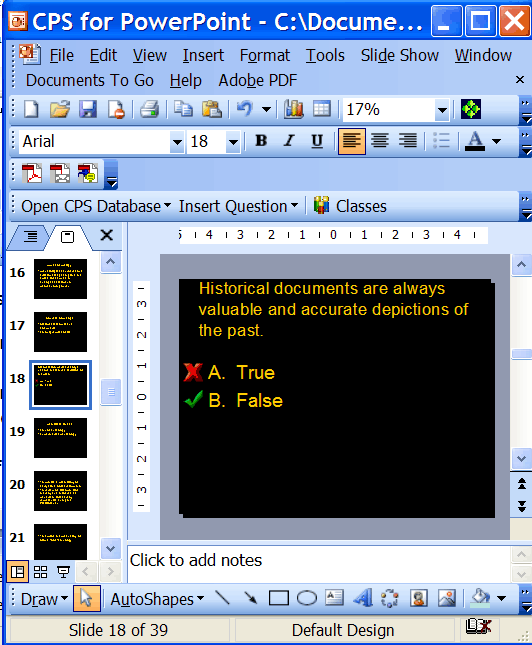
- Type in your question text in the [Enter question here] text field. The typed text does not have to be inside the brackets; however, it does have to be typed in the textbox.
- Type in your answer options: [Option 1], [Option 2], [Option 3].
- Select the correct answer by clicking on the red 'X' next to the correct answer.
- The red 'X' will turn into a green check mark.
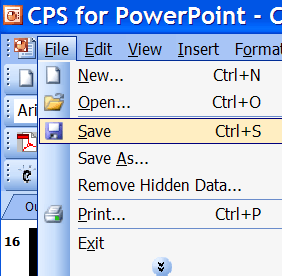
- Save your file.
Engaging students in a clicker question
- From the Start menu, open CPS for Power Point.
- Open your Power Point presentation file.
-
Deliver your presentation as you normally would.
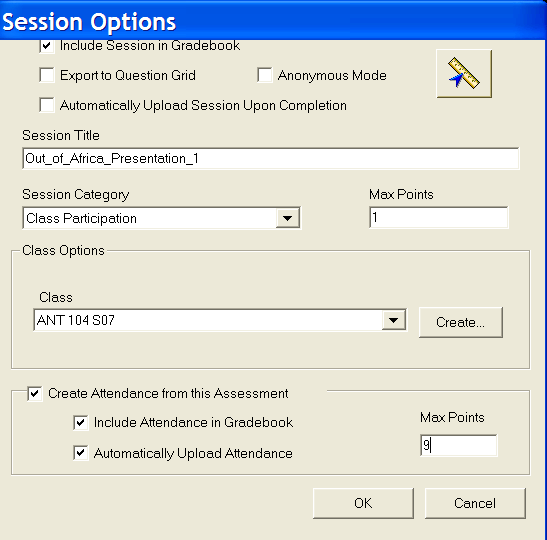
- The Session Options dialog box appears.
-
From the Session Dialog Box, you can
-
Include the session in the Gradebook.
-
Engage the session in Anonymous mode.
-
Title the session.
-
Choose a session type.
-
Set the Max Points available for the assessment
-
Create attendance from the assessment.
- Type in a session title.
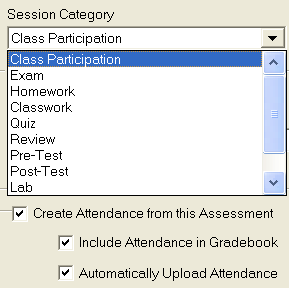
- Select the Session Category from the drop-down list (i.e., Class Participation, Exam, Quiz).
- For the Session Category, you will need to type in the maximum number of points.
- Select the class from the drop-down list.

- If you plan to use the gradebook, select the Include Attendance in the Gradebook and Automatically Upload Attendance checkboxes.
- Type in the maximum points (MaxPoints) given for student attendance.
- After you select OK, the session begins.
- Proceed through your slides as you would in MS Power Point.

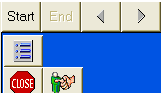
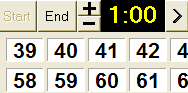
- When you reach a clicker question slide, click the Engage button on the Engage toolbar (located at the bottom of the Power Point slideshow).

- Start the question.
- The Feedback Grid appears.

- Students send their responses by selecting the A or 1 button, and then the Send button.
- Give students time to respond.
- Select End to terminate the response cycle.
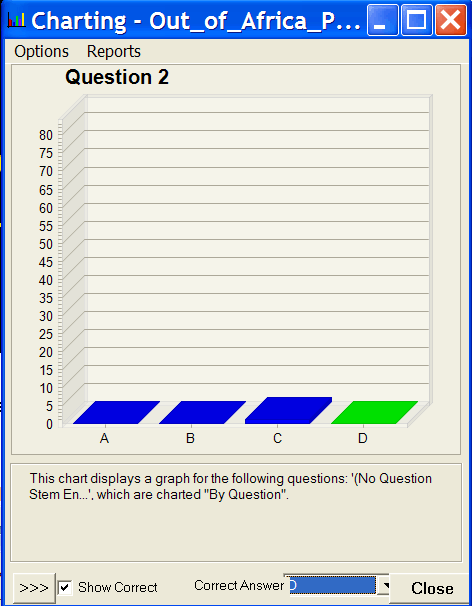
- If you want to display the chart, select the Charting button
 .
. 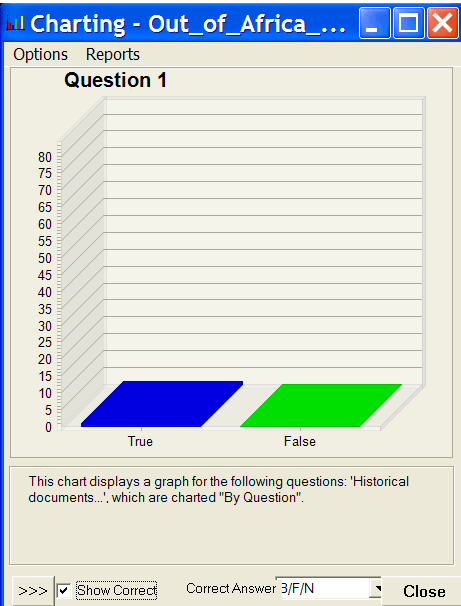
- By selecting the Show Correct text box, the correct answer will display in green.
- Close the Charting display.
- To change delivery options, select the Delivery Options button
 .
. 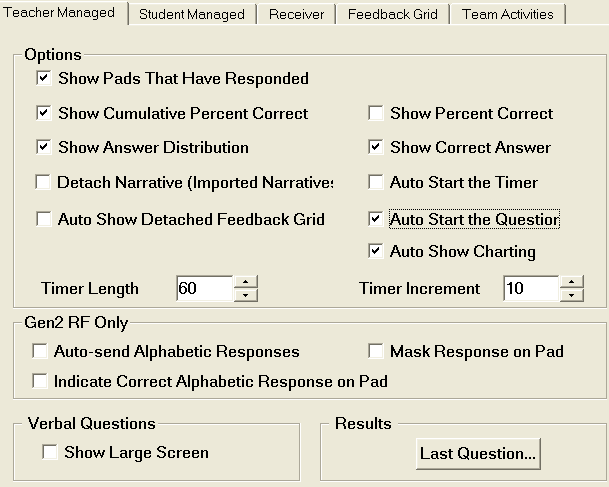
- For this Teacher Managed presentation, select the options you want from the Delivery Options Dialog Box.
- To end the engagement session and move on to the next slide, you need to select Close
 in the Engage dialog box.
Engaging verbal clicker questions on the fly
- From the Start Menu, open CPS for Power Point.
- In CPS for Power Point, open your Power Point presentation file.
- Deliver your presentation as you normally would.
-
The CPS Engage toolbar automatically appears with your presentation.
-
When you reach a clicker question slide or a break in your presentation where you would like to ask the students a question, click the Verbal button on the Engage toolbar
 .
.
- Select the Question type.
- The CPS Content Delivery window appears.
-
Type your question and answer choices in the spaces provided or just ask your question verbally to the students.
- Be sure to Start the question.
- Students send their responses by selecting the A or 1 button, and then the Send button.
- Allow students to respond.
- Select End to terminate the response cycle.
- If you want to display the chart, select the Charting button .
- By selecting the Show Correct text box, the correct answer will display in green.
- Close the Charting display.
- To change delivery options, select the Delivery Options button .
- For this Teacher Managed presentation, select the options you want from the Delivery Options Dialog Box.
- To end the engagement session and move on to the next slide, you need to select Close in the Engage dialog box .
Taking attendance using CPS for Power Point
- From the Start menu, open CPS for Power Point.
- Follow the Hardware set up instructions.
- Select the Classes tab.
- Ask the students to turn on their clickers and join the session.
- Choose the Attendance button.

- The attendance grid appears.
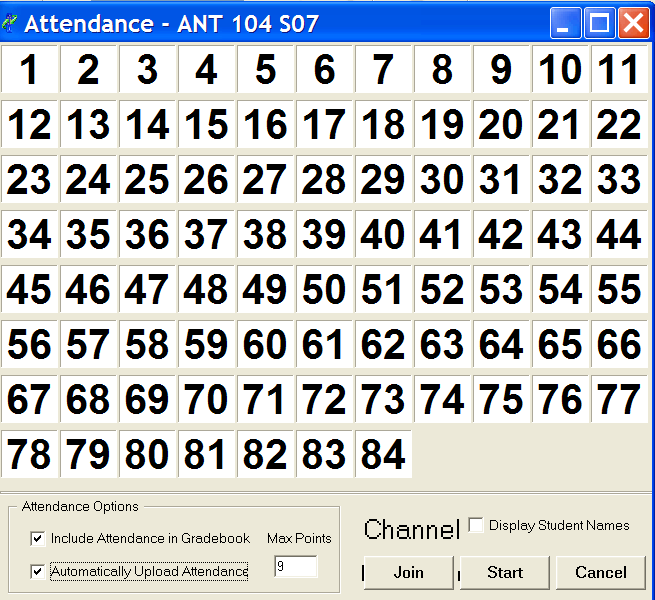
- If you plan to use the gradebook feature, select the Include Attendance in the Gradebook and Automatically Upload Attendance checkboxes.
- Choose Start.
- Students send their responses by selecting the A or 1 button, and then the Send button.
- Give students time to respond.
- Select End to terminate the response cycle.
- Each response submitted will be recorded in the attendance grid (color change) and uploaded to the gradebook.
- See Generating Reports to view the attendance results.
Generating Reports
-
Choose the Report button. The CPS Reports tab appears.

-
Select the session title.
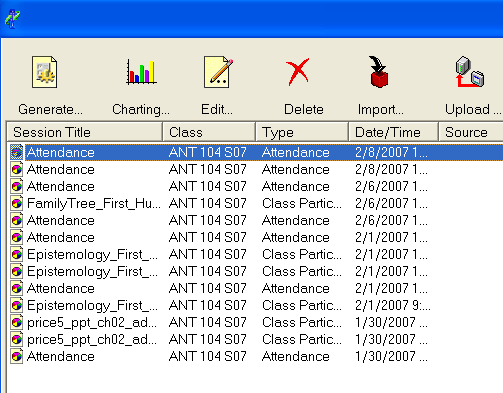
- Choose the Generate button.

- Select all the check boxes next to the student names you want included in the report.
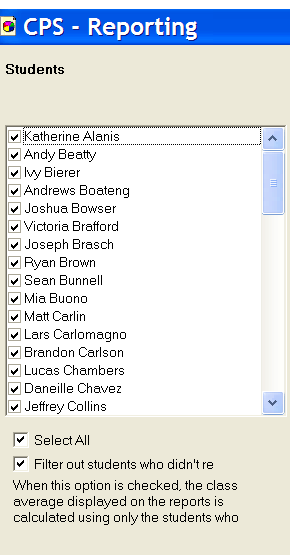
*Note: Depending on your circumstances, you might consider unchecking the Filter out students who didn't respond default check box.
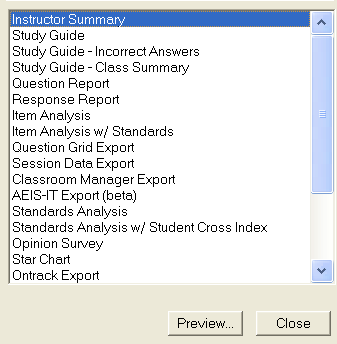
- Select the type of report you want to generate such as Instructor Summary, Item Analysis, Session Data Export.
- Choose the Preview button.
- To save your file to your computer, select the file format in Output menu bar.

- The following file formats are available for output:
- Print
- RTF File
- PDF File
- Formatted HTML File
- Text File
- Excel Spreadsheet
*Note: Remember this cannot be directly imported into Blackboard Vista without reviewing the data closely (user names may be different).
- Save the file to your computer.