StudyMate
StudyMate, a powerful authoring tool, lets you create ten Flash-based activities and games using three simple templates. The Flash activities can be used with any web server or published directly to Blackboard Vista. Users import items from MS Word files and publisher test banks to create interesting, interactive activities from existing content.
Setting up StudyMate
NAU has a campus-wide license for StudyMate. You can download StudyMate from the ITS. Search by either Windows in the Platform field or by Development in the Category field. Respondus is not currently available for Macs.
Look for the StudyMate link:
Select the link to go to a page that discusses StudyMate's features. This page also has very important information in red. This includes the installation password. It is a good idea to keep this page open after you download Respondus. When opening Respondus, you can copy and paste the information into the appropriate fields.
When you are ready to download the software, select Utilities/StudyMateCampus.exe (this is how it currently appears – the link may be named differently in future versions).
To download the StudyMate manual select the link to the user guide in the Installation Notes.
Choose the manual labeled with the WebCT 6 / Vista Personality. This will download the zipped version of a Word document.
Publishing StudyMate activities to your Vista course
After you import your questions from a .rtf or .doc file and build your activities in StudyMate you will want to publish them to your Vista course.
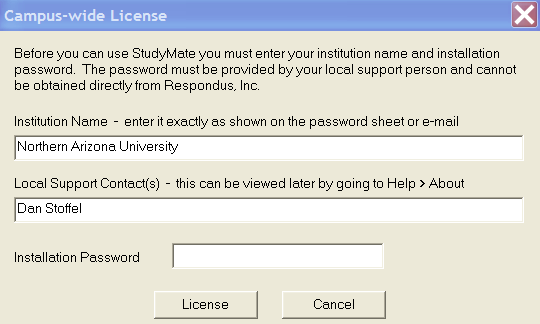
- When you first start using StudyMate, the Campus-wide License window appears.
- Enter the appropriate fields from the StudyMate download page.
Preview StudyMate activity
- Select the Preview & Publish tab.

- In the Preview tab, select the Preview the File button to view your activity .
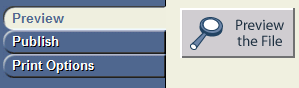
- When you complete review, close the Preview window.
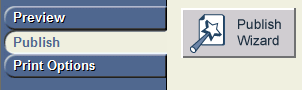
Publish StudyMate activity to Vista server
- In the Publish tab, choose the Publish Wizard button.
- Select the activities you want to create by choosing from the list of activities available.
- Select Next.
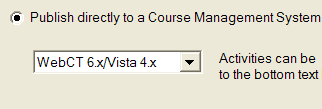
- Select WebCT 6.x/Vista 4.x in the Course Management drop down menu.
- Choose Next.
- On the Publish to WebCT 6.x/Vista 4.x server wizard, choose Standard Upload - SWF and HTML file in Learning Module or footer on Organizer Page.

- In the WebCT 6 Server drop down menu, select add new server.

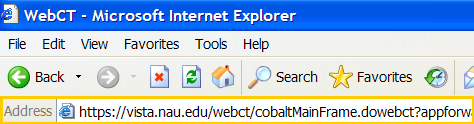
- Open your browser & log in to vista.nau.edu.
- Copy the address or URL of the course home page from the browser address field.
- Paste the address into the textbox on the WebCT 6 Server Information in StudyMate.

- Select the Extract button.
- The server domain should read https://vista.nau.edu.
- Select the Institutions button, and choose NAU-Institution from the drop down menu.

- Enter a description such as Vista login, your jan username and password, and if you would like the computer to remember your username and password.

- To close the Server Settings window, select OK.
- In the Settings box, the Server, Institution, and Username should be listed as illustrated below (with your username):

- Choose Next.
- The StudyMate Publish Wizard connects to the Vista server and lists your courses under the Group or Section drop down menu.
- In the Group or Section drop down menu, select the course where you want this activity to appear.

- Select the learning module, folder, or HTML file where you want the StudyMate activity to appear.
- Type in a file name for new HTML file where the activity will be added.
Note: Be sure not to use special characters or spaces in your file name.

- Select Next.
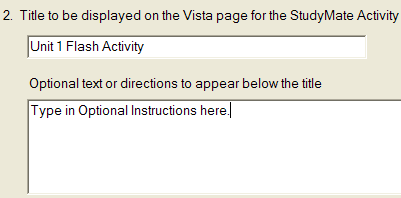
- Give the activity a title and any optional instructions that will be displayed to the students on the HTML page in Vista.
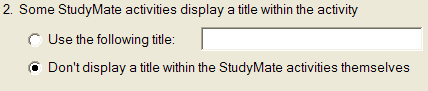
- Choose Don't display a title within the StudyMate activities themselves.
- Select Next.
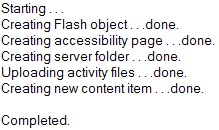
- In the status window, the publish process should say completed before you go into your Vista course to check your work.
Additional resources