![]()
![]()
NAU has purchased a site-license for the Zoom videoconferencing tool. This is a live (synchronous) tool, and requires a fast Internet connection and a good computer for best results. It's important to think about a backup plan for students who can't join or stay connected to the Zoom call, such as a recording of the live meeting, or an asynchronous version of the content, like a PowerPoint or a Word doc, for example, posted in Blackboard.
All Zoom lecture recordings are now automatically archived in Kaltura, making it easy for you to create pointers from Blackboard to Kaltura.
For more advanced training on Zoom, visit the Zoom training website. For a comparison of Zoom and Blackboard Collaborate Ultra features, here's an Excel table.
Getting Started: In your web browser, go to nau.zoom.us. If the app isn't already installed on your computer, choose the Download Client link at the bottom of the page, and install the app. You should only need to do this once per device.
Login: Click the yellow button to Sign In to zoom with your NAU username and password. If you are presented with options about how to log in, choose SSO (single sign-on) to login with your usual NAU credentials.
Calendar Plug-in: The plug-in allows you to create a Zoom meeting from your Outlook calendar. Go to the Sign In button, and select the Microsoft Outlook Plugin "Add Zoom" link, and click the Get It Now button.
Attend a meeting: To attend a Zoom meeting hosted by someone else, click on the invite link to the meeting from your e-mail or calendar, and the Zoom app will launch. Another way is to enter the Meeting ID and password. It's a good idea to join 2-3 minutes before the official start time to check your audio and video settings.
Host a meeting: As the host of a meeting, you can copy/paste the link for the Zoom meeting and email it to attendees or, with the plug-in installed, send invitations direct from your calendar. As participants join, they will be listed on screen.
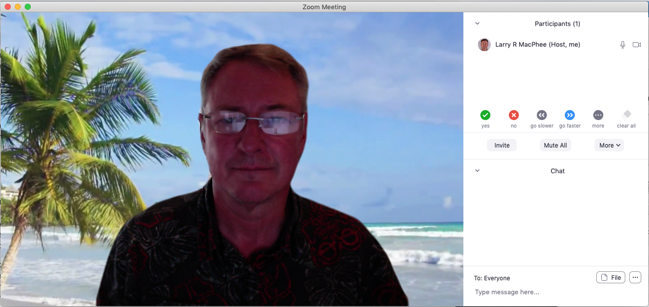
Zoom screen, with participants window open
Virtual Background: As shown above, Zoom gives you the option to use a virtual background to mask what's happening behind your camera. While it might seem like a gimmick, it can be useful to protect your privacy and reduce distractions. A plain background is also possible. You can access this setting by clicking the up arrow next to the camera icon at the bottom of the screen. You can even use your PowerPoint presentation as your background.
Permissions: Hosts start out with more privileges than participants, but you can give privileges to the participants so they can share their screen, for example. If you need to leave the meeting before it's over, and you're the host, you can hand ownership to another participant.
Zoom Toolbar: The following features are available to the host. A subset of these tools is available to participants.

Mute, Stop Video, Security, Participants, Chat, Share Screen, Record, Breakout Rooms, Reactions, End
Mute/Unmute Mic: It's a good idea to mute your microphone when you're not speaking, because Zoom will switch focus to the person speaking (or coughing, or breathing heavily, or to the dog barking in the background). However, when you want to speak, unclick the Mute button. If you forget, Zoom will warn you that you're speaking while muted, but this happens a lot! It's often a good idea for hosts to mute all participants at the start of the meeting.
Tip: Leave your mic muted and hold down the space bar to turn on the microphone while you speak. When you release the space bar, you're automatically muted again.
Stop/Start Video: When you're not speaking, especially on a choppy connection, it can help for everyone but the presenter to stop their video. You can add a nice photo of yourself in the settings rather than use the generic person icon. There are some screen backgrounds available under the Video button, but they can be a bit gimmicky. However, they can be useful if there's a lot going on behind you that might be distracting.
Security/Privacy: You've probably heard about cases where unauthorized people enter a Zoom session and create a disruption. Zoom has implemented several features to prevent this, including a waiting room, where the host must admit attendees (practical for smaller sessions), and a meeting password option so that only invited guests can access the meeting. The password is now required. We also recommend that in the Settings/View More Settings option, you don't disable the default NAU Users Only setting, as shown:
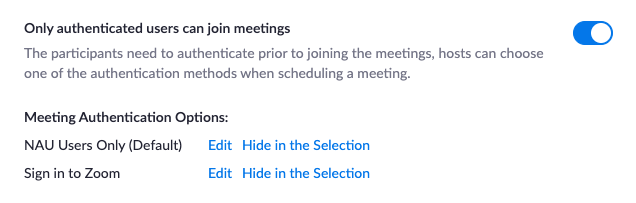
If you need to admit a non-NAU person such as a guest speaker or an ASL signer to assist students with a hearing disability, getting them an Affiliate Account is a good option.
Participants: The NAU license allows for 300 participants. More than this requires a paid extension called a Large Meeting License. This often overlooked tool allows you to solicit feedback from your participants. There's an Invite button to add people by searching their names. There is also a "raise hand" feature that you can encourage people to use when they have a question, rather than interrupt the flow of the presentation. Up to 49 participants, in a 7x7 grid, can be visible on screen simultaneously.

Chat: The chat window can be another useful way to manage comments and questions, but it's impossible to lead a presentation and read the chat messages at the same time, so it's very helpful to have an assistant who is physically in the room with you, monitoring the audio with headphones, and managing the chat area. They can get your attention when there's a good question for the whole group, and can respond individually to the more specific questions. In a classroom setting, maybe this duty can be rotated among students for a small number of points? The chat area is also a handy place to share files, links, and email addresses.
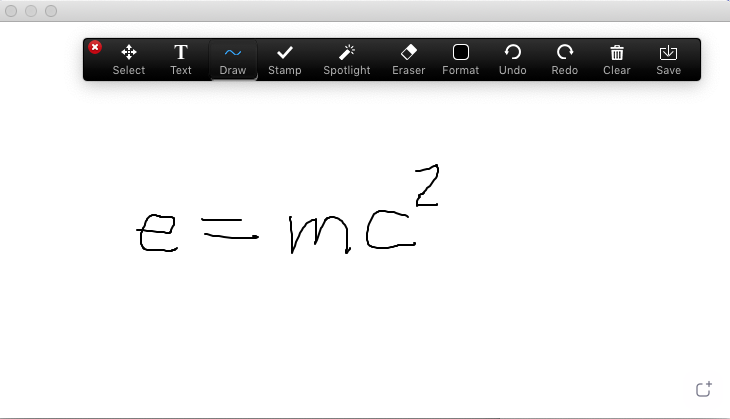
Share Screen: If you want to present with a PowerPoint, or show a video, the share screen feature is useful. You can also invite participants to share their screen. Sharing your presentation also allows you to break away from the lectern (with a wireless headset mic) and keep presenting. You can use a clicker to advance slides or assign a helper to do that. If you're in a classroom with a slow connection and you need to show a video, upload the video to Kaltura (either from the Mashups tool in Bb Learn, or at mediaspace.nau.edu) in advance and share the link instead of presenting it through Zoom. Note: You have the option to share your whole desktop, or just a selected window. If you choose to share just a window, participants won't be able to see anything that happens outside that window. Often missed, there's a whiteboard feature in the Share Screen options that may be useful for hand-writing equations with a stylus, for example.
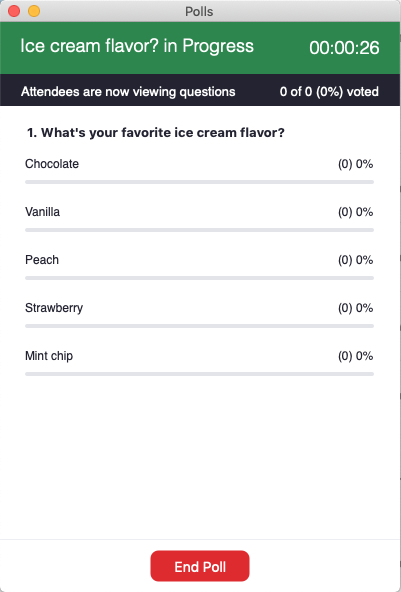
Polling: An advanced setting you can turn on under View More Settings after launching the Zoom app and clicking the settings icon in the upper right corner. Try this link.
Record: You can record your meetings in Zoom. We recommend you save to the cloud, though you also have the option to save the recording directly to your computer. Cloud recordings will be saved until the end of the semester and then purged. Start the recording at the beginning of the meeting. Be sure to stop the recording before you end the meeting. After the meeting is over, you'll get an e-mail with the link to the recording that you can share with participants. If you want to save your recording permanently, download it to your computer and then upload it to Kaltura.
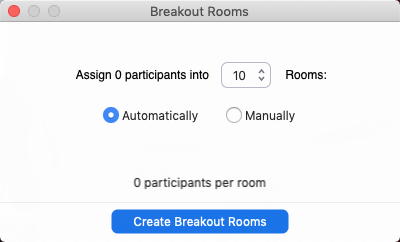
Breakout Rooms: For collaborative activities with small groups, you can automatically or manually send groups of students to virtual "breakout rooms" to work together. Since you can't be everywhere at once, this requires some trust and can be a bit hard to manage. For asynchronous group work, we recommend Google Apps or Microsoft Teams, where the students set up the collaboration space and share it with you so you can review their work.
Reactions: Allows participants to send applause or a thumbs up. Useful for an initial audio check, for example. "Can everyone hear me ok? Click the thumbs up icon under Reactions if you can."
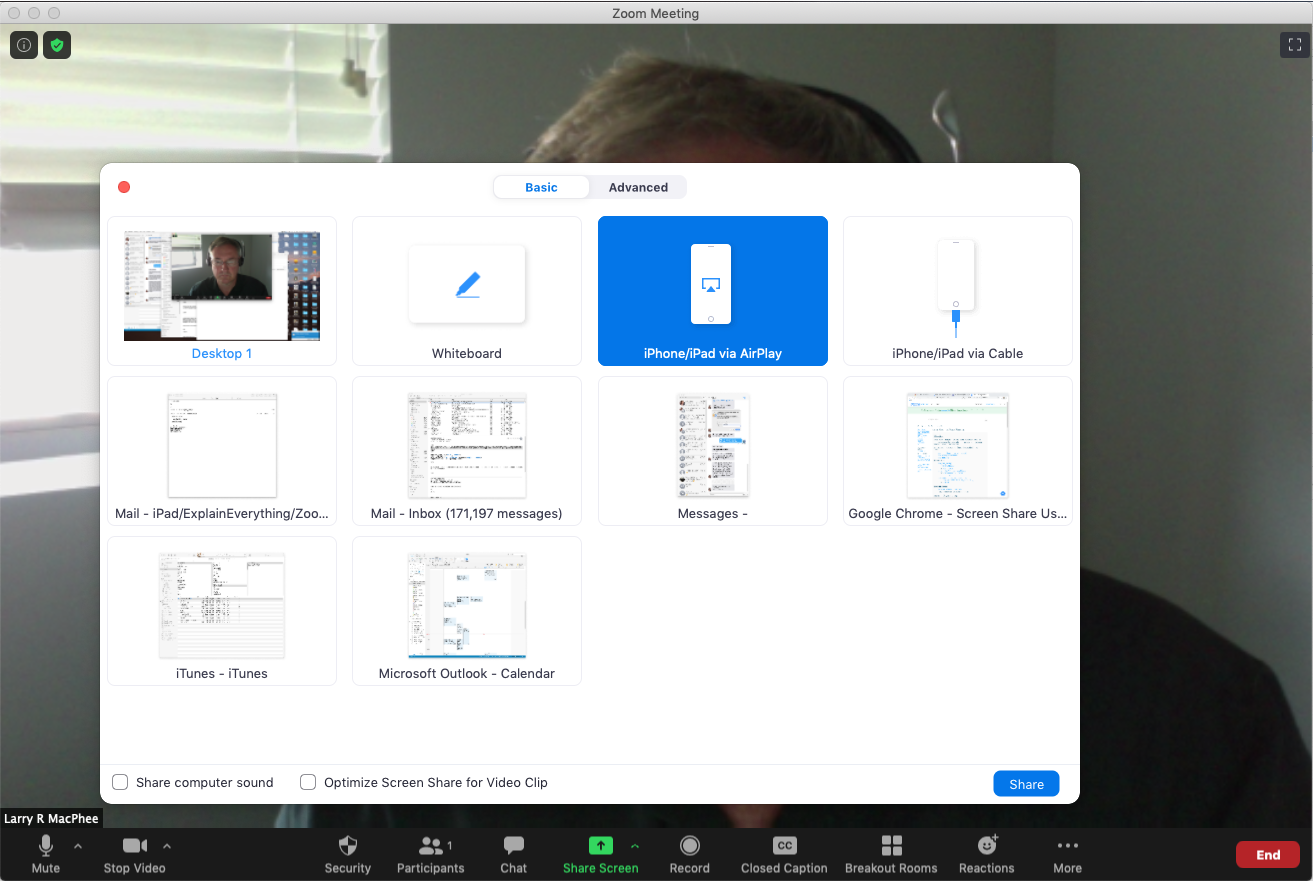
Advanced: Use Zoom with an iPad: In some cases, you may want to use an iPad with a stylus so you easily write out equations or make annotations over a graphic. The Zoom app for iOS is somewhat limited, but this workaround is effective. Run Zoom from your computer and link the iPad (either by a cable or wirelessly with AirPlay) to your computer. When you start a screen share, select either iPhone/iPad via AirPlay, or iPhone/iPad via Cable.
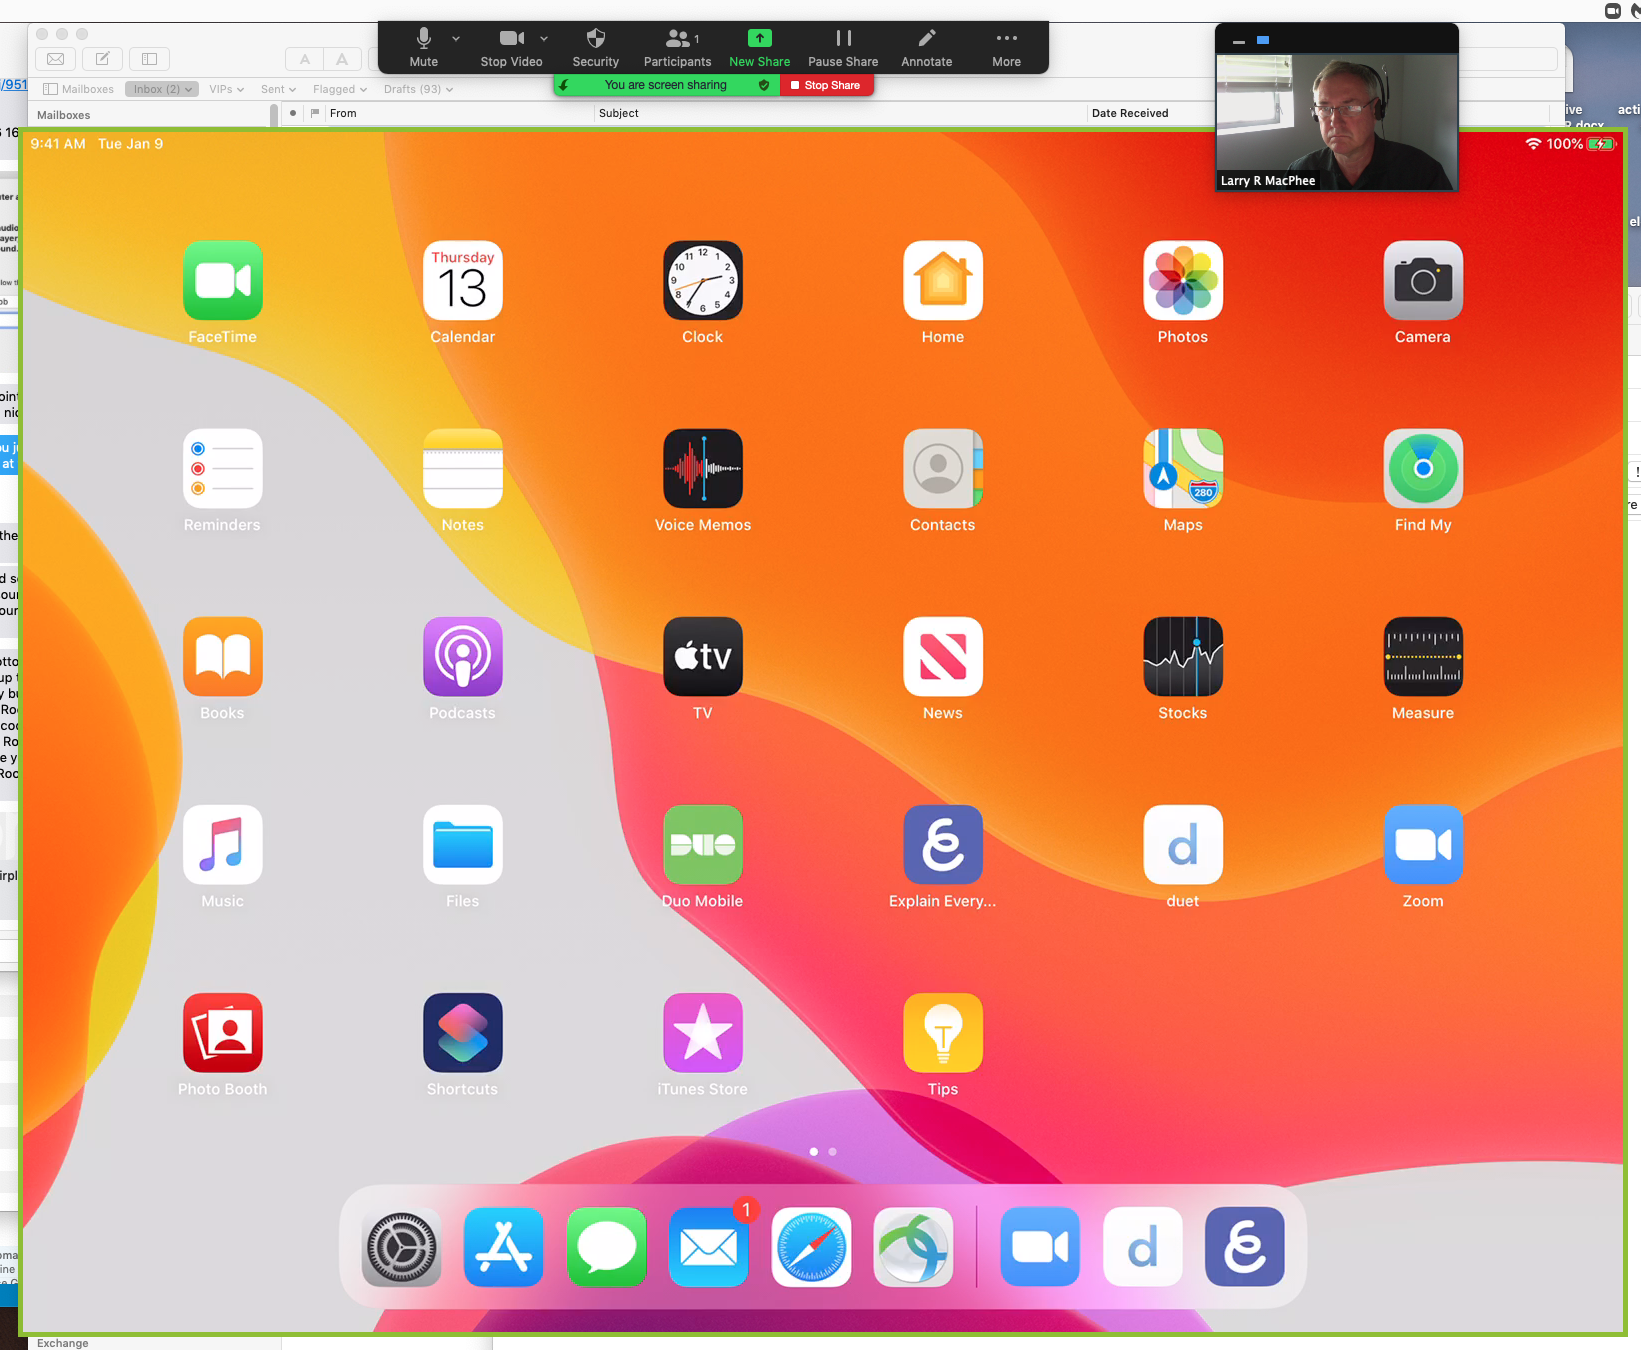
Then you will be sharing the iPad screen, and can use any iPad app in the screen share. For example, Explain Everything is a great app for writing notes.

Flagstaff, Arizona
928-523-9011
| Flagstaff Campus | News & Media | NAU Community | Policies |
|---|---|---|---|
| Maps & Directions | NAU News | Current Students | Accessibility |
| Transportation | Media Relations | Future Students | Diversity |
| Parking | Parents | Equity and Access | |
| Calendar of Events | Safety | Alumni | Privacy |
| Jobs at NAU | NAU Alert | Living on Campus | Title IX |
| NAU Police | Bookstore | Student Consumer Info | |
| Emergency Management | Student Services | ||
| © 2021 Arizona Board of Regents | |||